Why you need it
Without librg
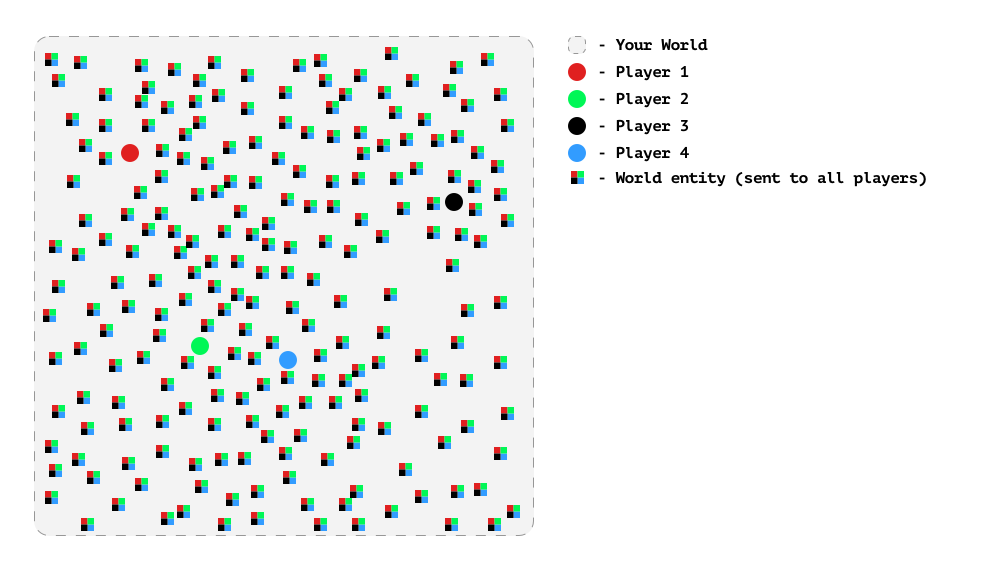
Usually, the networked game world consists of a set of networked players and a bunch of networked entities. The typical variant of setting up the synchronization relations between entities and players is to set up Everything-to-Everyone connections.
This is the most basic setup to follow. However, with an increasing amount of entities, it becomes rather bandwidth-inefficient.
OR
wget https://github.com/zpl-c/librg/releases/latest/download/librg.h -O librg.h “`
Documentation
To read detailed documentation about the library, see examples, and a quick start guide, please visit our documentation page.
Additionally, you can check code/apps folder for actual code examples.
Illustrations
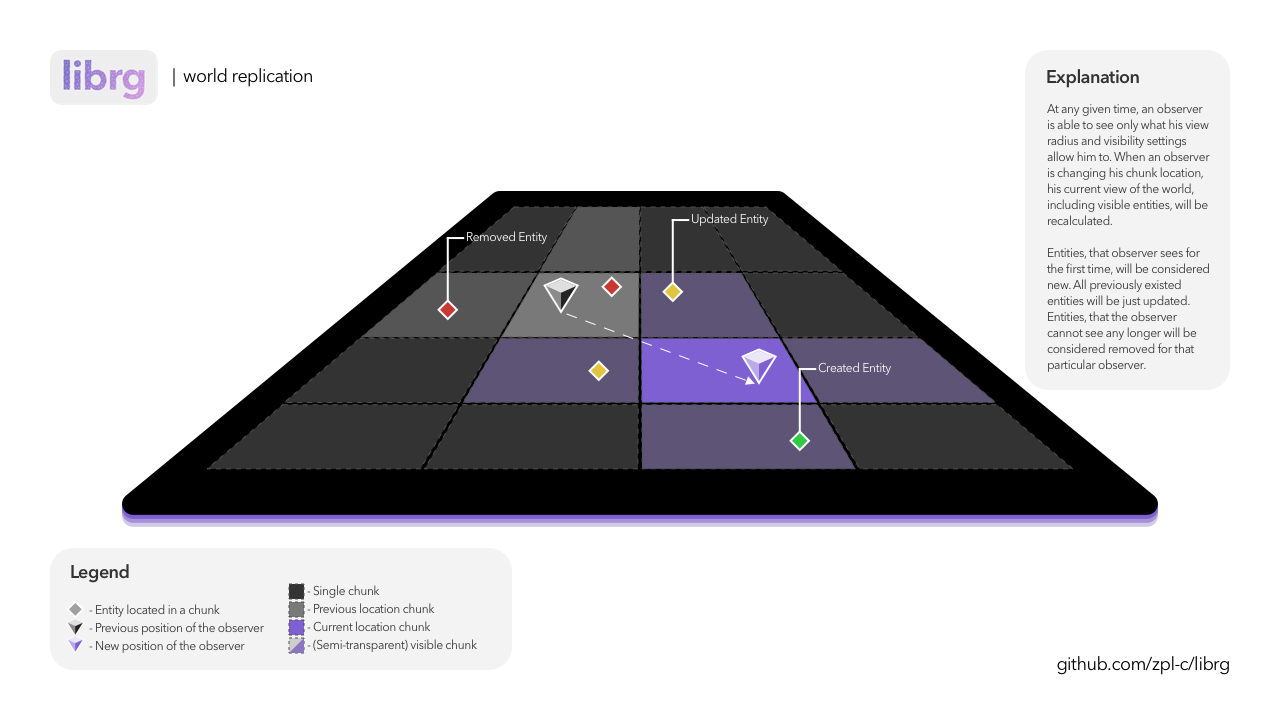
World Replication
Here is a simple illustration that attempts to replicate how the library works on a simple 2D world of 4x4 chunks. For a 3D world of bigger size, everything would work in a very similar way, just in 3 dimensions.
World Protocol
And this picture showcases the structure of the underlying binary protocol that is used to encode and decode data from/to. The resulting binary buffer could be inserted into any other buffer, saved to disk as a file, or sent via the network using any available method. Putting custom data alongside every entity within the packet allows context-dependant data storage that extends capabilities and allows memory- and bandwidth-efficient entity replication.

Migration
If you’ve used the library before version v6.0.0, it is recommended to read the migration guide located here.
Legend:
- ❔ - The library was not tested on this platform/compiler yet
- ✅ - The library successfully compiles, and all tests are executed properly
Development
If you wish to contribute, add new features, optimizations, or overall improvements, here are the instructions on how to do that:
- Clone the repo, f.e.:
git clone https://github.com/zpl-c/librg.git - Run
maketo build all projects and verify everything works - Develop a feature, add tests for it in
code/tests/ - And eventually run
make testagain to check
In case you are working from Windows, and/or are not able to use make, you can also use the built-in cmake config file to generate a Visual Studio solution, to do that:
mkdir buildcd buildcmake ../misc -G"Visual Studio 16 2019"(or any configuration you have)cmake --open .(opens VS with the solution)- And repeat steps from above
For developers, it offers nice benefits:
- compile- and run-time configurable
- written in C99 (portability reasons)
- no external dependencies
- built-in unit test coverage